

What is home composting and why start
Home composting turns kitchen scraps and yard waste into nutrient rich material for gardens. It reduces landfill waste and improves soil structure.
For beginners, composting can seem technical, but simple systems work well for most households. This guide gives practical steps to start and maintain a basic home composting system.
Choose the right system for home composting

Select a method that fits your space, time, and patience. Common options include backyard bins, tumblers, and indoor bokashi or worm bins.
Consider these points when choosing:
- Available space and sun exposure
- How much organic waste you produce
- Maintenance time and odor tolerance
Backyard bin for home composting
A simple stationary bin is low cost and low effort. It is good for yard waste and mixed kitchen scraps.
Pros: inexpensive, holds large volume. Cons: slower decomposition, needs turning.
Tumbler and fast composting
Tumblers speed up breakdown by making turning easy. They are cleaner and reduce pests when sealed properly.
Pros: faster, neater. Cons: smaller capacity and higher cost.
Indoor options: worm bin and bokashi

Worm bins work well in apartments and produce vermicompost quickly. Bokashi is an anaerobic fermentation that accepts meat and dairy.
Pros: space efficient and low odor. Cons: require learning new routines.
Basic materials and balance for home composting
Compost needs three basics: carbon, nitrogen, and oxygen. Carbon rich materials are called browns and nitrogen rich materials are greens.
- Greens (nitrogen): fruit and vegetable scraps, coffee grounds, grass clippings
- Browns (carbon): dry leaves, shredded paper, cardboard, straw
- Air and moisture: maintain a damp sponge like feel and turn to add oxygen
Aim for a general ratio of 2 to 3 parts browns to 1 part greens by volume. Adjust based on smell and moisture.
Step by step setup for home composting
Follow these steps to get started with a basic bin or pile.
- Pick a location with good drainage and partial shade.
- Start with a layer of coarse material like twigs for airflow.
- Add alternating layers of greens and browns, aiming for balance.
- Keep the pile moist but not waterlogged.
- Turn the pile every 1 to 3 weeks to add oxygen and speed decomposition.
Troubleshooting common home composting problems
Some problems are easy to fix with small adjustments.
- Bad odor: add more browns and turn the pile to introduce air.
- Too dry: sprinkle water when turning the pile.
- Slow breakdown: chop materials into smaller pieces and increase turning frequency.
- Pests: avoid leaving meat and oily foods in an open bin; use a closed tumbler or bokashi for those items.
When is compost ready
Finished compost looks dark, crumbly, and earthy. Small pieces of original material may remain. Typical time ranges from 2 months for a hot, well managed system to 1 year for a low maintenance pile.
How to use finished home composting material
Use finished compost as a soil amendment, top dressing, or potting mix ingredient. It improves soil water retention and nutrient content.
Apply a 1 to 2 inch layer around plants or mix into garden beds to a depth of 4 to 6 inches before planting.
Small real world example
Case study: A two person household in a suburban area started a 55 gallon tumbler. They added kitchen scraps and lawn clippings with a 3:1 brown to green ratio. By turning once a week and keeping the mix moist, they produced usable compost in 10 weeks.
Result: They cut their weekly trash by one small bag and saved about 50 dollars per season in store bought soil amendments.
Practical tips to maintain home composting success
- Keep a small counter bucket to collect kitchen scraps and empty it daily to the main bin.
- Shred or chop large items to speed breakdown.
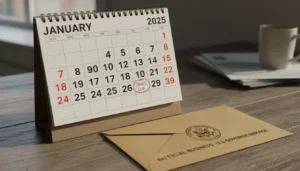
- Record turns or use calendar reminders to rotate and monitor the pile.
- Use a thermometer for hot composting to track microbial activity if you want faster results.
Summary and next steps for home composting
Home composting is practical and scalable. Start small, learn the balance between greens and browns, and adjust as you go.
Choose a system that fits your living situation, maintain moisture and airflow, and use finished compost to improve garden health. With consistent, simple steps you can turn waste into a valuable resource.